Last updated on June 10th,>>>
Best settings for Camstudio screen recorder for screen recording in HD format. The visual demonstration works much better than a list of instructions. If you need to make a demo video or video for youtube try these settings for Camstudio.
Camstudio is an open-source screen recording software. It’s completely free for personal use. It can record any screen activity, full screen or user-defined regions of the screen.
It can also record audio either from an attached Microphone or from the built-in system’s speaker.
Free screen recording software like Camstudio, have become quite popular with bloggers and teachers alike.
You can use this software to create a demonstration video. Create Video tutorials for schools and college classes. And videos for YouTube also.
There are many tutorials as to the best settings for Camstudio for HD recording. I have tried quite a few of these tutorials but was not satisfied.
After lots of trial and error, I found these settings for Camstudio for HD recording as the best. This video (below) was captured in these settings.
If you prefer video tutorial… Watch the video for the best settings to record HD quality video.
Download the latest version of CamStudio and install.
After launching CamStudio you will see the following menu options.
1: File
2: Region
3: Options
4: Tools
5: Effects
6: View
7: Help.
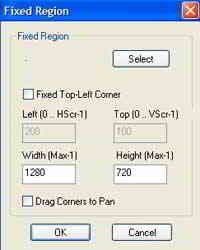
Click on the Region menu. Click on the “fixed region”.On the fixed region set Width to 1280 and Height to 720 (these are in pixels). You can also use higher pixels but your file size will increase.
Options menu:
Video options: choose CamStudio Lossless Codec, set Quality to 100.
Click on configure and choose LZO and level at 6
Set keyframes at 20
Capture frames every at 50 frames
Playback Rate at 20 frames/second.
Do not check/ enable Auto Adjust option
Click OK to save your settings.
For Audio Recording:
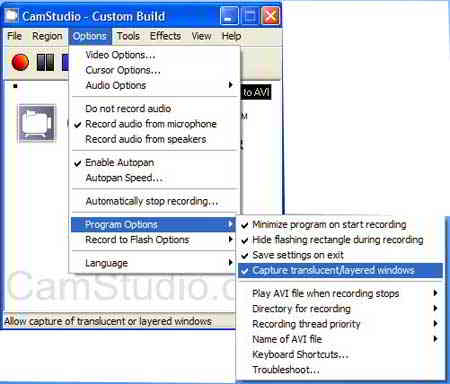
Click on the options menu, If you do not want to record audio click on do not record audio.
If you want to narrate and record audion than click on “Record audio from microphone”
Under the options menu, you can also select “Enable Auto Pan” this will make your video follow your cursor movement while screen recording.
If you want to show the cursor movement while recording, under options menu click on “cursor options”. Enable show cursor and Use actual Cursor options.
You can also choose the color and size which will encircle the cursor, the default yellow color and size are good enough.
Program Options:
Click on options > Program options, make sure to enable these options.
1. Minimize program on start recording
2. Hide flashing rectangle while recording.
3. Save settings on exit
4. Capture translucent/ layered windows
5. Recording thread priority to Highest.
6. Directory for recording> use user-specified directory
Recording format:
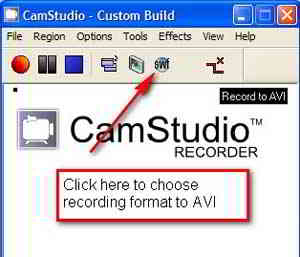
Just below the menu bar, you will see a globe or a star icon on clicking that you get two option SWF or AVI, choose AVI as the recording format.
That’s it, I found this to be the best setting for Camstudio to record HD quality screen recording. The file size will be big you will need to convert the video to MP4 format to compress and reduce the video file size.
Check out: Convert Your Videos To Any Format
Camstudio is completely free, you can download the latest version from its site. Additionally, you can also download the Camstudio lossless codec pack, from the same site.
This codec was used to record the above video. It is important to install and use this codec for better compression and smaller file size.
The latest version comes bundled with the codec. So after installation, you can check under options > video options > compressor. If its there, no need to download.
CamStudio can also add high-quality, anti-aliased screen captions to your recordings in seconds and with the unique Video Annotation feature.
As I said earlier, there are many variations in the settings for Camstudio. But the settings described here, I feel is the best settings for Camstudio for recording HD videos.

Hello! I am Ben Jamir, Founder, and Author of this blog Tipsnfreeware. I blog about computer tips & tricks, share tested free Software’s, Networking, WordPress tips, SEO tips. If you like my post /Tips then please like and share it with your friends.

