Last updated on May 11th,>>>
Are you looking for a quicker way to to install Windows? a much faster way than the DVD ? than here’s how to create a bootable Windows 10, 8, 7 USB Flash Drive
If you’d like to install Windows but don’t have a DVD drive, it’s easy enough to create a bootable USB flash drive with the right installation media. Here’s how to get it done for Windows 10, 8, or 7.
USB flash drives have not only replaced the Floppy disk drives as the best storage medium, but it is also slowly but surely replacing the optical drives ( CD, DVD).
Page Contents
Why you need to have a Bootable Windows USB flash drive?
USB flash drives are much faster as far as file transfer is concerned, has more capacity and has longer shelf life. A few reasons why you should choose a USB flash drive over a DVD disc, and a bootable operating system is definitely one of them.
Windows installation CD or DVD can get spoiled and unreadable for many reasons like high temperature, humidity, scratches etc.
USB flash drives are much smaller in size, easy to carry, easy to store, has more capacity, read write speeds are much faster than CD/DVDs.
Data copy such as setup files and access time during installations are also significantly faster, making your windows installation faster.
Therefore, installing something like a operating system like Windows, installation much faster from a USB flash drive than from a DVD.
This easy to follow guide will show you how to create a Bootable Windows 10, 8, or 7 USB flash drive.
For this purpose we will be using this tool from Microsoft itself, Windows USB/DVD Download Tool.
Check out: My Computer Turns Off Without Warning : Troubleshoot
Create A Bootable Windows 10, 8, 7 USB Flash Drive
This tool is normally given when you purchase Windows from the online Microsoft store. However now this tool can be freely downloaded.(more on that later)
Find and keep your Windows installation DVD at hand. If you already have an ISO image file of Windows installation DVD, then go to the next step.
Create ISO image file from Windows installation DVD
Download and install this FREE software “FREE ISO CREATOR” or if you are not comfortable with this software you can try this “IMGBURN” both are free software and can be used to convert your windows installation DVD in to a ISO image file. Once ISO image is created save it in your hard disk.
Step by step guide to make a bootable windows USb flash drive
STEP 1:Download and install this tool WINDOWS 7 USB/DVD Download Tool
STEP 2: Get your USB flash drive and insert it on your PC usb slot. The USB drive (Pen drive) must be of 4GB capacity.Make sure to save any file you may have on the USB flash drive since it get formatted.
A good quality from a reputed maker is preferable since here we are making a install-able operating system, there shouldn’t be any compromise in quality.
STEP 3: Launch the tool “windows 7 USB/DVD download tool” which must have created a desktop icon during the installation. After initialization you will get this window.
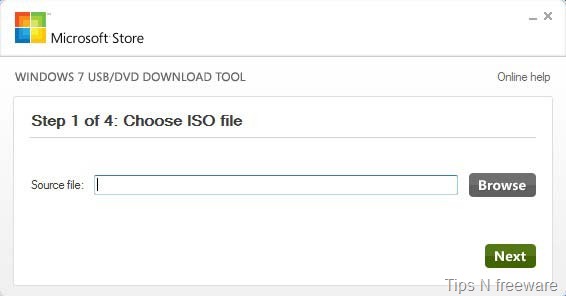
STEP 4: Here under ”Source file” browse for the ISO which you created earlier in step 1, from the windows installation DVD. Once the tool loads the ISO file you will get this window.
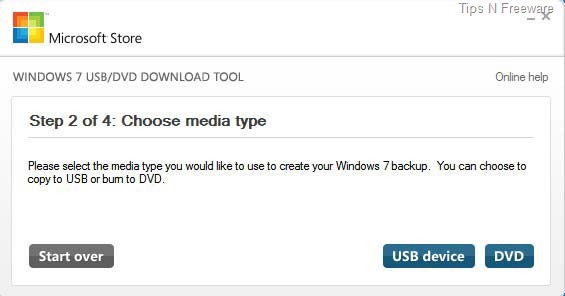
STEP 5: Here its pretty obvious. Plug in your USB flash drive and Choose “USB device” and click on it.
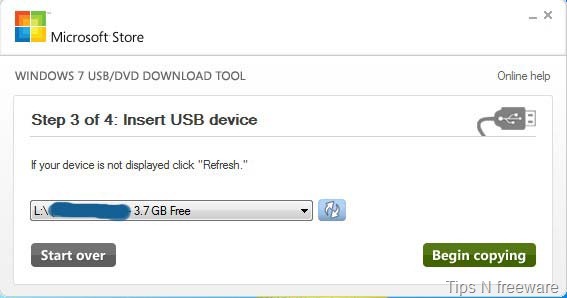
STEP 6: In this step it will show the name of your USB flash drive(if you have a name) and also the capacity of the drive. Now click on the “Begin copying” button.
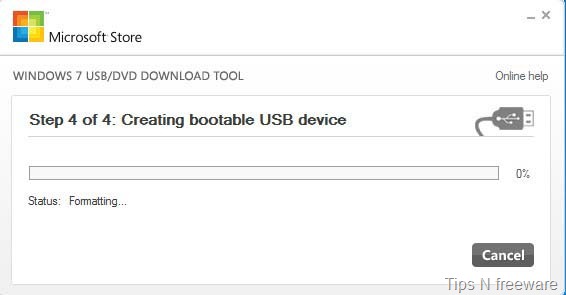
STEP 7: The tool will first format the USB flash drive and copying of file will start, the progress is clearly shown as a light blue colored progressing bar.
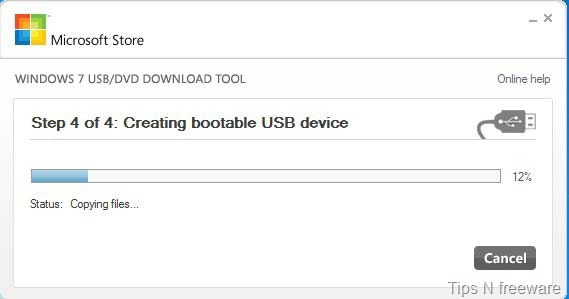
STEP 8: This process of copying and creating a bootable USB flash drive may take a couple of minutes depending on your system. Once the process is completed you will get this message.
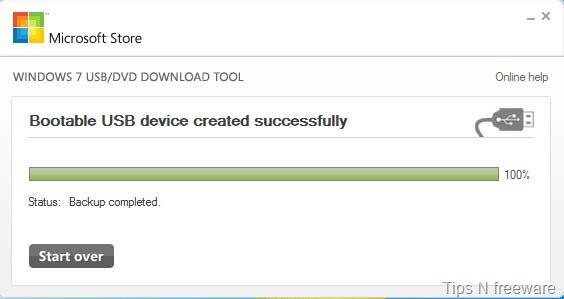
STEP 9: This message “Bootable USB device created successfully” tells you that the operation has been completed successfully without any error.
Now you can unplug your USB device from the “ windows safely remove hardware” dialogue at the task bar and close the tool.
If you want you can test the just created Bootable device by plugging it again to your computer, restart your system go to the BIOS either by pressing the “Delete” or “F12” button (that depends on your system) and configure in the Bios the first boot device as USB device, and let the system boot. Window’s installation process should start.
I hope you could follow the guide to create a bootable windows 10, 8, 7 USB Flash Drive.
Hope this article was helpful. If you have enjoyed this you may like to subscribe for my feeds at the bottom of this page for all future updates.

Hello! I am Ben Jamir, Founder, and Author of this blog Tipsnfreeware. I blog about computer tips & tricks, share tested free Software’s, Networking, WordPress tips, SEO tips. If you like my post /Tips then please like and share it with your friends.




Thank you so much for Your tips,free and right software and all the steps to make a Bootable Windows 7 USB flash drive.Its a dream come true for me since my DVD Drive is not working and so every time my system needs to format i need a external DVD Writer which i do not have.But from now on i can format from my Flash drive. It was very helpful.
Hello Bendang LKR
Thank you for visiting and am happy the article was help to you. Making a bootable USB is the best option, for its reliability and ease of use.