Last updated on July 31st,>>>

Turn your ideas into a successful blog or website in just a few minutes A step-by-step guide with images on how to create your own blog for free.
There are quite a few free platforms where you can start a blog or your very own website for free of cost. You can read my detailed review on popular FREE blogging platforms you can try to start a blog or website.
Whether it’s a blog, a personal website, or a company website, all are websites, and you need to start somewhere.
Today I will share how to Create A Free Website For Blogging from scratch. A detailed step-by-step guide with pictures. This will be a great guide if you plan to have a personal website or a blog.
There’s no arguing that there are two undisputed kings for creating a free website, Google’s Blogger and the content management system-turned-host WordPress.com.
Both WordPress.com and Blogger.com are workable free solutions, but which is the right one? Opinions differ, but I choose Blogger.com to Create A Free Website For Blogging.
Page Contents
Why Blogger? for the reasons given below
- A template designer for customizing your blog’s appearance.
- Free hosting, free Blogger (or Blogspot) sub-domain, and the option of using a custom domain (either registering through Blogger or using one you already have).
- The ability to add media to your posts, with no quoted maximum storage space.
- Has the added advantage of Google’s robust secure platform and reliability.
- Quick access to Google’s advertising schemes.
- Pages static content on your blog.
- Mobile access via iPhone and Android apps, as well as SMS or email blogging.
Let’s start creating your first website for free
| At the end of this tutorial, you will be in a position to create a website of your own. |
The Sign-Up Process
Blogger is a Google service, and just like YouTube, requires a Google account. If you already have a Google account, like a Gmail account, then this makes signing up a painless affair.
But if you don’t (which is highly unlikely), you’ll have to register for the whole package. Seriously, if you don’t have a Google account, then head over to GMail.com.
Sign up for a Gmail E-Mail account. You will need this Gmail account for all your future correspondence. Remember one Google account for all Google services.
Once you’ve got yourself an account, it’s time to start to create a website. With a Google Account, you’re free to establish multiple blogs on the Blogger service.
Let’s Create A Website
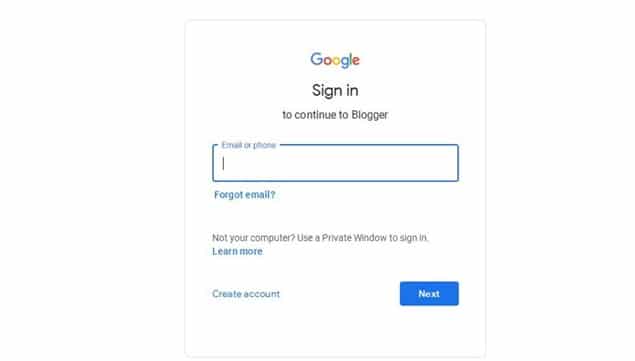
Step 1: Open blogger.com. Click to sign in.

Step 2: Log in to Blogger with the Gmail ID you just created. Enter your email ID and password.
Step 3: After you log in to blogger.com, you will see this welcome page.
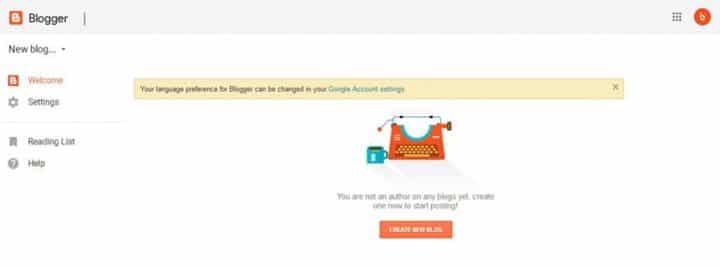
Step 4: On the Welcome page click on “Create New Blog”. You will be presented with this page.
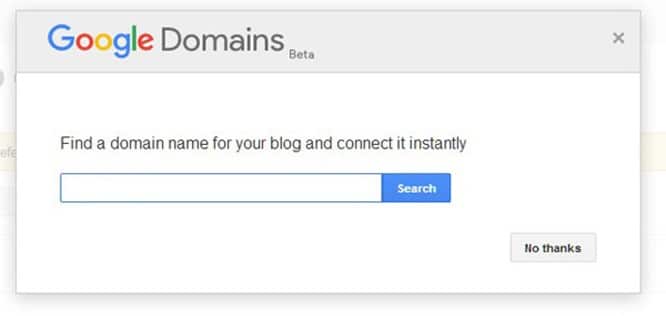
This page is basically to search for domain name availability and buy the domain name. But since we are here to create a website for free, just skip this step and click on “No Thanks”
Step 5: On the next window you will be asked to give your profile name.
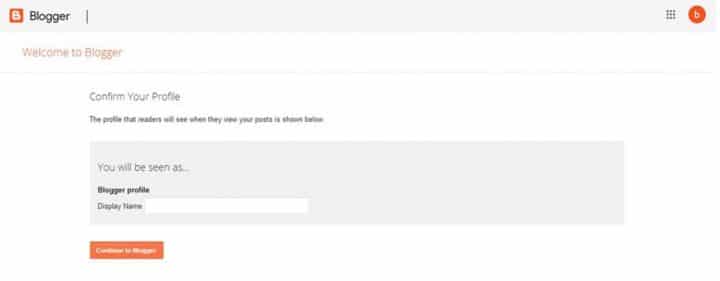
As shown in the above image, your Blogger profile is what the readers will see when they view your posts/articles that you publish. I suggest you give your name in this field. Then click on “Continue to Blogger” at the bottom.
Step 6: On clicking continue to blogger, you will get this page.
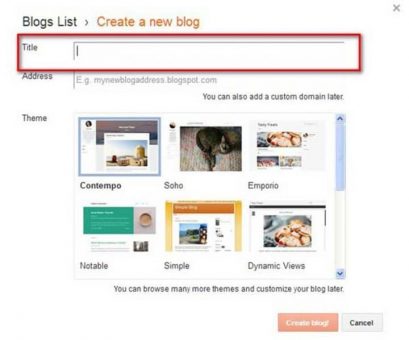
This step is important because it’s here that you will have to enter the Title for your website. The title will depend on what niche your website will be. Niche means the topic you will be writing about. It’s basically all about your website.
You may go through my last post on How to start a blog. As it’s very important to decide first on what niche your blog will be.
Because based on the blog title you will have to choose your new website address. A website address is a permanent URL, also referred to as permalink.
Step 7: After entering your website Title, next on the address bar enter your preferred website name.
Remember since this is a FREE website hosted on blogger, your website URL will be like https:www.your site name.blogspot.com
The moment you enter the website name /URL, the blogger will automatically search if that URL is available or not. If already taken you will get the following message. Sorry, this blog address is not available.
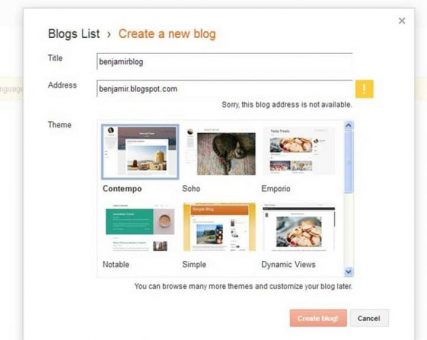
Nothing to worry about! this happens. Since there are millions of websites, there is every possibility that the site name you choose is already taken by someone else.
On the image above you can see, I tried a site name with my name! even that too was not available.
Think and try as many names as you can think of, with slight changes to the original site name. Just make sure that your new website name and URL is catchy, easy to remember, and easy to spell too.
Step 8: Once you get a name that is available since blogger will search it for you every time you enter a name, you get this message, This blog address is available. See the image below.
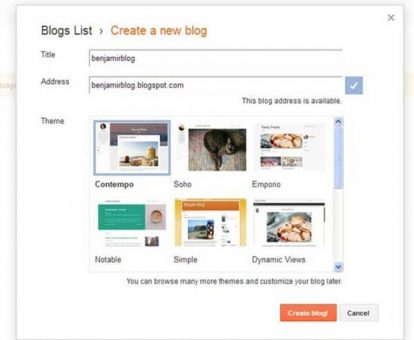
Now you can relax. You have got yourself a new website by that name and URL. Without wasting any time now click on the “Create Blog ” tab at the bottom of this page.
The most important part of creating a website is now over.
After you click on create a blog, the blogger will show you this image as live on blog view of your new website.
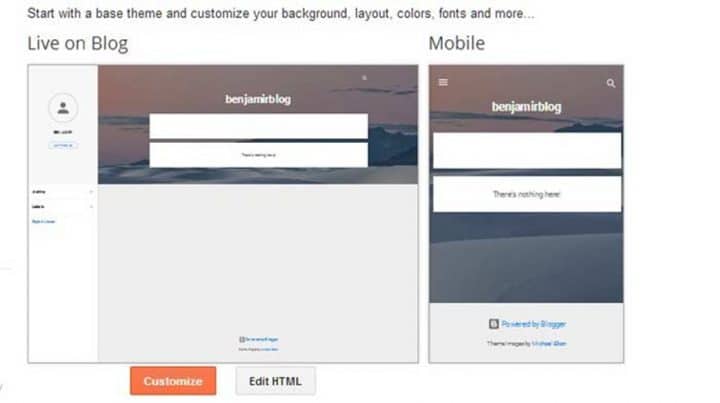
Step 10: Of course there will be nothing to display since it’s a new website. Except for the website title on a default blogger template.
Before we proceed further to design the new website, on the left panel click on settings. This will open the settings page of your new website with all the information.
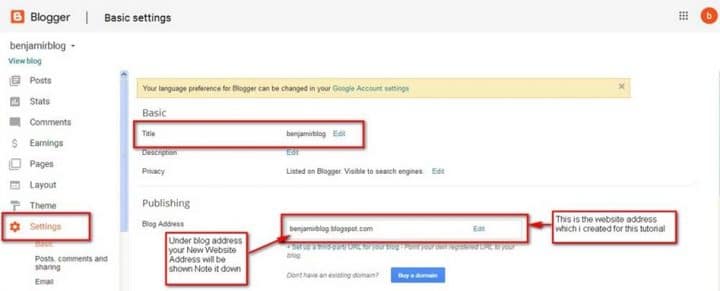
Here the things you may like to note down are the Website Title and the Website Address. Because this is the website address you will share with your friends, family members.
Just below the title click on Edit under description. In the description, box write something about your website.
The description should be brief. Write a brief description of your website. If it’s a blog on what niche (topic) you will be writing on. If it’s about a product, give a brief description.
Just enough so that your reader will get the idea of what this website is all about.
Now, let’s start to design your new website.
Again on the left pane click on “theme”.
On the theme page, you will see many free themes. There are many more free themes available on the net, you just have to Google it.
Here I have listed 5 best and fast loading themes that you can check out, all free.
For now, let’s choose a theme that is already installed and ready for use.
You can click on any theme for preview. For this tutorial, I am selecting a simple blog theme. (by the way that’s the name of the theme).
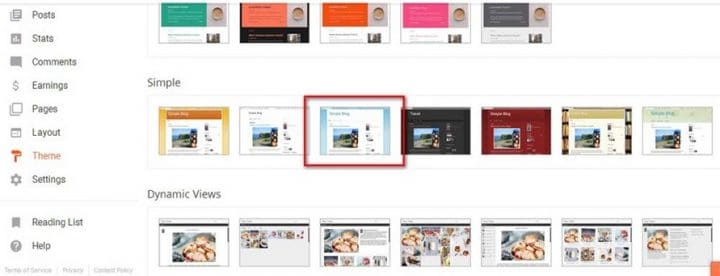
Step 12: Click on the theme for preview, then click “ Apply to Blog ” at the bottom of this window. The selected theme will be applied to your new website.
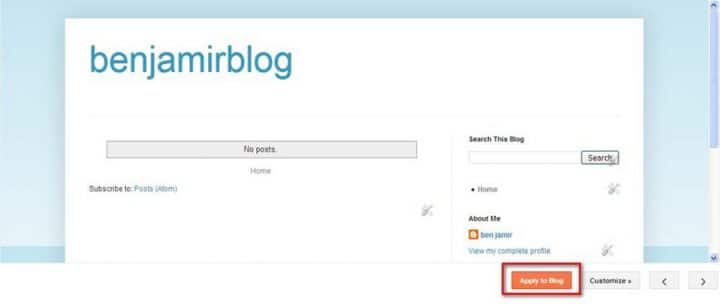
Step 13: Before you start writing your first article, let’s have a look at the website layout. The layout is where you can design the look of your new website.
On the left panel options, click on Layout. You will see quite a few gadgets like the Navbar, Header, Main blog page, featured post, popular posts, etc.
You can left-click and drag these gadgets and reposition them where you want.
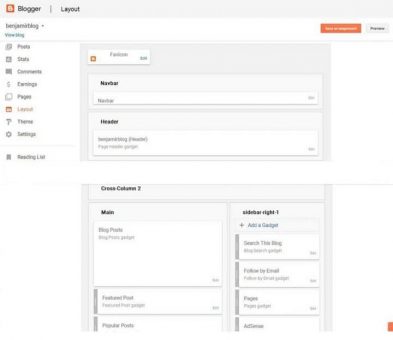
Additionally, on the layout page, you will see the “Add a Gadget” tab. If you click on that, the blogger will show 26 or more gadgets that you can use on your website. For example, see the image below:
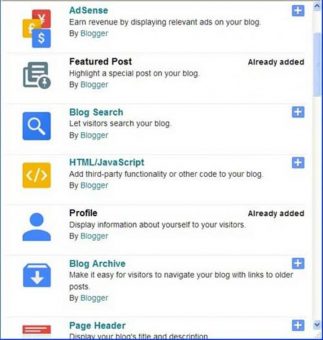
You are almost done! your new (blank) website is ready.
Depending on what niche (topic) your new website will be, you will need to write something, upload images or videos, and publish it.
On the top of the left panel click on “Posts” and then click on “New Post”

The new post page will be opened. If you are using Microsoft Word, you will be familiar with most of the editing tools on this page.
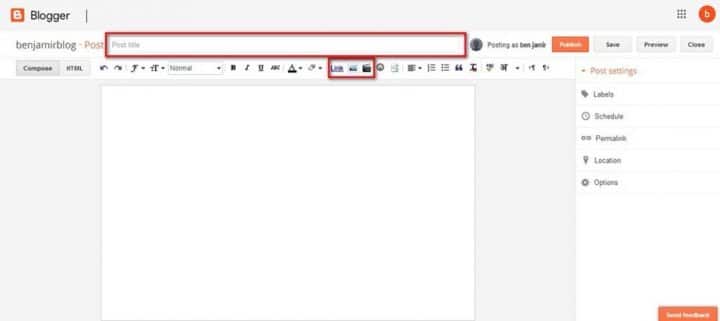
On this page under Post, write the Post title. Choose the post title carefully, so that the title and the content of your post-match.
Suppose your post title is “How to train your Dog ”. Then your content should tell the reader exactly how to train your dog. Your content should not deviate from the title.
On the new post page, you can add a picture or a video also. Click on the respective icons in the editing toolbar. If you want to insert an image in your article, click on the image icon.
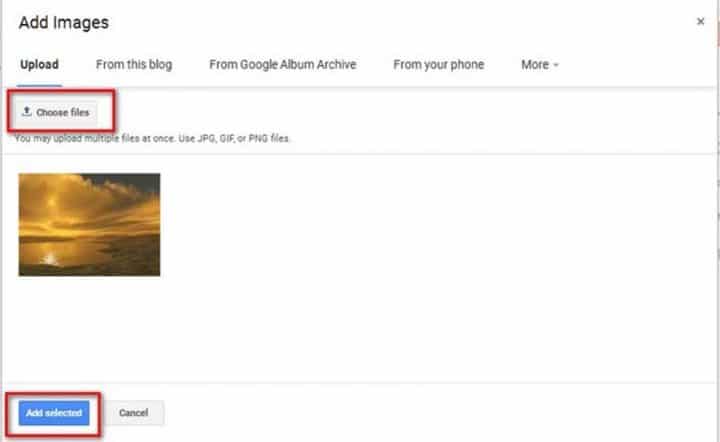
This will bring up the Add Image window. Click on the upload tab, to upload an image from your computer. Select the image file on your computer and click on it. The image will be automatically uploaded.
The uploaded image will be shown on the Add Image window. Click on the image you want to insert on your post, at the bottom click on “ Add selected ”. The selected image will be inserted on your post content page.
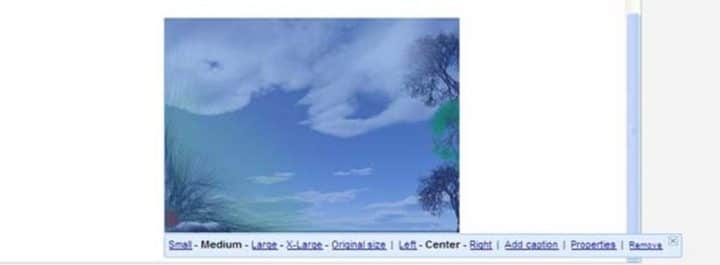
Once the image is inserted, click on the image for further options, you can choose to display the smaller image version, large, or even the original size.
You can also align the image on the left, right, or center of your content page. All options are self-explanatory.
Write your topic. You can preview your new website before you hit the Publish button.
For this tutorial I have written some random topics, to show you how a finished website will look like if you preview it.
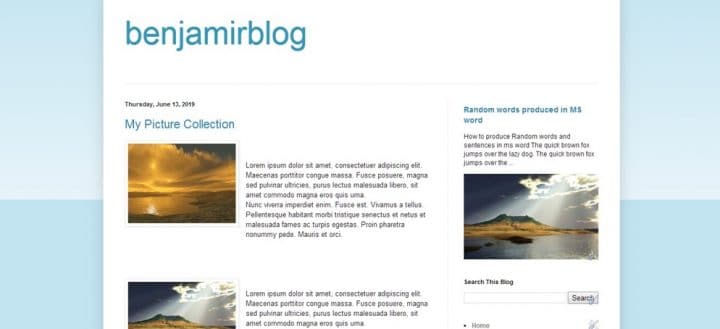
Previewing your website is always advisable. On preview, if you don’t like something you can always edit. for example, changing the font size, color, etc.
If you are satisfied with the preview, click on the Publish tab to make your new website go live.

That’s it you have successfully created your own blog website for free. From now on all you have to do is write regularly and publish.
I sincerely hope this tutorial on how to create a website will be of help to a beginner. There are still many ways to customize your website, which you will learn as you go on.

Hello! I am Ben Jamir, Founder, and Author of this blog Tipsnfreeware. I blog about computer tips & tricks, share tested free Software’s, Networking, WordPress tips, SEO tips. If you like my post /Tips then please like and share it with your friends.


