Last updated on September 17th,
The registered owner’s name is one of the many questions Microsoft asks you when you install Windows.
Once you choose the name of the owner, Microsoft uses this information as the person to whom Windows is licensed.
If you bought a second-hand computer, the operating system will show the original owner as of the person to whom the operating system is licensed.
Using a quick registry edit, you can change the name of the registered owner’s name to anyone you want.
How to check the user name in Windows
If you have bought a second-hand Pc and want to see the name of the person to whom your copy of Windows is licensed, click on Start and type
winver
in the search box and press the Enter key and Windows brings up the About Windows window.
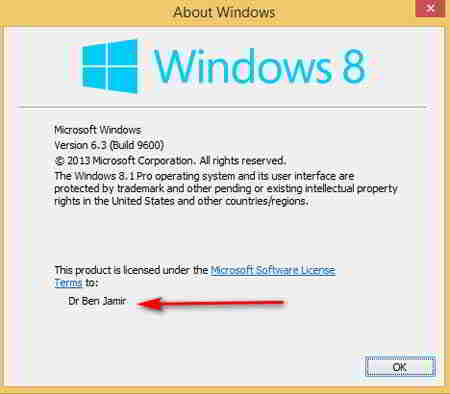
Here you will find all kinds of information including the edition of Windows you are using, the current version of the operating system, and the person who holds the license to use Windows.
There’s a very simple and easy way to change the registered owner’s name on a windows PC. Change it in Windows Registry in a few seconds.
In case you missed: How to Find Your Original Windows Product License Key
Here’s how to change the registered owner name in windows PC
In Windows Run field type regedit press enter. This will open the Windows registry editor.
In the Windows Registry editor window on the left half search and browse to the following
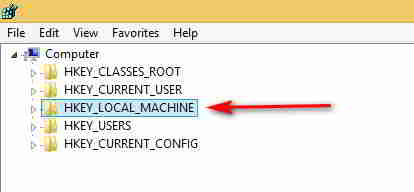
HKEY_LOCAL MACHINE\SOFTWARE\Microsoft\WindowsNT\CurrentVersion
Double click on the Current version. This will open the current owner’s name and organization name on the right side.
Under this, you will see both a “ RegisteredOwner and “ RegisteredOrganization” value on the right half.
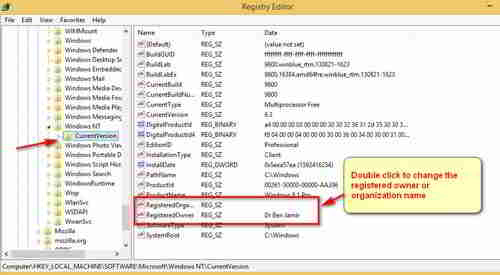
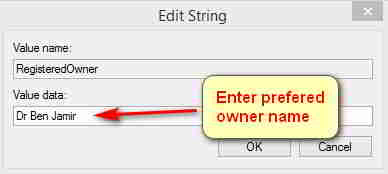
To change the registered user name, double click either one or both this will open the Edit string window. Enter here the name of the owner or the organization whichever you want to change then click on OK.
Click on Exit to save and exit the windows registry editor. That’s it you have successfully changed the registered owner name.
NOTE: Just a word of caution, if you are not sure what you are doing, do not play with the windows registry. Back up your registry before attempting to modify registry entries.

Hello! I am Ben Jamir, Founder, and Author of this blog Tipsnfreeware. I blog about computer tips & tricks, share tested free Software’s, Networking, WordPress tips, SEO tips. If you like my post /Tips then please like and share it with your friends.


