Last updated on December 30th,>>>
In this WordPress tip, we will show you how to make or to create a sticky floating Sidebar widget in WordPress using a plugin and without a plugin.
The Sidebar is one of the most useful white area of a blog which can be used for different widgets, these widgets can make your website more engaging. Sidebar helps to increase the Click Through Rate (CTR) of the website.
In this post, we are going to learn how To Make A Sticky Floating Sidebar Widget In WordPress.
Check out: How To Measure Your Website Page Load Time Correctly
Page Contents
There are two methods to make widget sticky in the sidebar.
1: Creating any widget Sticky Using a Plugin.
2: Creating the last widget Sticky Without Plugin.
Why should you have a floating sticky widget?
If you are a blogger or own a WordPress website and your post content is long, as you scroll down your sidebar will be blank if you don’t have much content on it.
So its good to have a sticky floating widget on the sidebar, which will stick as your reader scroll down the content page. This will naturally get your reader’s attention.
What kind of floating sticky widget can you have on the sidebar?
Show Popular Posts.
Display Featured Posts.
Embed Chat Box.
Embed Subscriber Widget.
Display Affiliate Banner.
Show Recent Posts.
Social Sharing Icons.
Advertisement Box.
Coupon Codes.
Stick or Float any widgets.
Method 1: Make A Sticky Floating Sidebar Widget using Plugin
Fixed Widget plugin is a popular and widely used to Make A Sticky Floating Sidebar Widget In WordPress
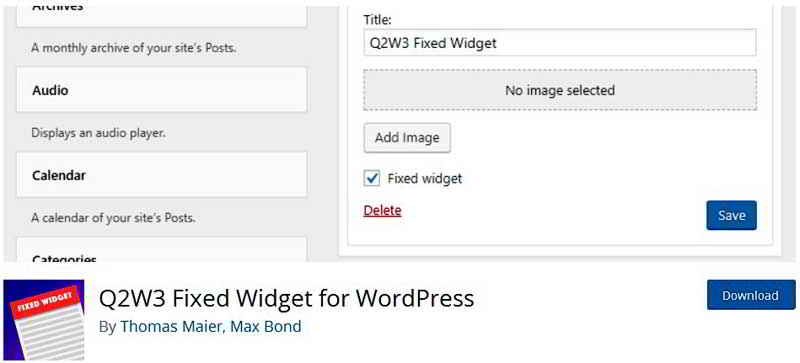
The first thing you need to do is install and activate the Q2W3 Fixed Widget (Sticky Widget) plugin. After installing activate the plugin.

Then go to Appearance » Widgets. The plugin adds a Fixed Widget option in all of your widgets. Check the Fixed widget box on the widget that you want to make sticky and click on the Save button to store your changes.
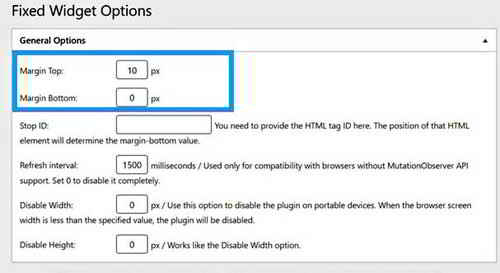
Sticky Widget plugin comes with options to configure the positioning of the fixed widget.
To access its options> Go to Appearance >Fixed Widget Options to configure. On this page, you can set the top and bottom margins, add your own HTML IDs and even disable the fixed widgets on phone and tablets.

Method 2: Create A Sticky Floating Sidebar Widget without a Plugin.
If you prefer the plugin method, you need not read further. However, as a WordPress webmaster, you know that plugins are known to slow down your page load time.
The second approach to create a sticky floating widget in WordPress is using the CSS code. It is a lightweight approach you just need to write (copy-paste) a small CSS code in your themes Additional CSS box.

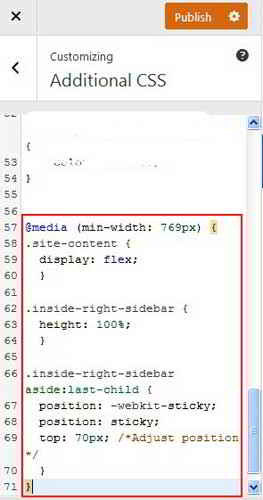
To add the CSS code go to Appearance > Customize > Additional CSS. In the additional CSS, box add the following code. ( you can copy and paste the below code)
@media (min-width: 769px) {
.site-content {
display: flex;
}
.inside-right-sidebar {
height: 100%;
}
.inside-right-sidebar aside:last-child {
position: -webkit-sticky;
position: sticky;
top: 70px; /*Adjust position */
}
}
Please note: This code is for themes with the right sidebar. If your blog website has a left sidebar adjust the code accordingly.
For example “.inside-right-sidebar” or “.inside-left-sidebar”. If required you can also adjust the top value in pixels as per your theme.
We hope that this article helped you create a sticky floating sidebar widget in your WordPress site.
Conclusion:
Which method would you prefer? If you are not familiar with using codes or altering codes, you can use the Fixed Widget plugin method.
I personally prefer the CSS method, one plugin less.

Hello! I am Ben Jamir, Founder, and Author of this blog Tipsnfreeware. I blog about computer tips & tricks, share tested free Software’s, Networking, WordPress tips, SEO tips. If you like my post /Tips then please like and share it with your friends.


