
How To Create Table Of Contents In WordPress Posts And Pages
Last updated on October 7th,>>>
The table of contents in your post improves the user experience. Here’s how to create one easily
A table of content makes it easier for users to jump to the section they want to read, like the one you see in Wikipedia. In this article, we will show you how to easily create a table of content in WordPress posts and pages.
First, let’s try to understand why we need to have a table of contents in our posts and pages.
Benefits of having Table of Contents in WordPress
1: It Improves the user experience.
2: Since Google loves long-form content, like having more than 2000 to 2500 words. Having Tables of content for long articles allows users to quickly jump to a section that is relevant to them.
3: Besides, having a Table of Contents your individual sections can rank in Google search, thus improve in SERP result page.
4: You don’t need to create a separate post or page for a particular section.
5: SEO benefits: If you have a long article, with different sections of that topic. Every section will act as a sub-topics and will appear in the search engine result.
Also, see 10 easy ways to improve SEO ranking immediately.
This is possible only if you have a table of contents in WordPress posts, that will allow the user to click on a topic section and jump to that particular sub-topic section.
One website that really does so well with the table of contents is Wikipedia
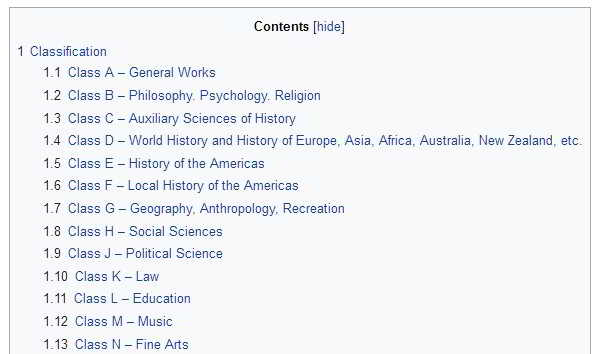
You can easily create this type of Table of contents in WordPress blog posts and pages. Every link on a table of contents will take your reader straight to that section. Without requiring to scroll down or up.
Even though this post is not that long to have a table of contents. I created a table of contents, as a live example.
And it took me just a few seconds to create. I will show you how you too can create a Table of contents in WordPress.
Also, see 10 easy ways to speed up a WordPress site in a few minutes
How to Create a Table of Contents in WordPress
If you are on WordPress, it’s super easy to create a beautiful Table of contents with a Plugin.
The Plugin we are going to use is the Easy Table of Content.
How to configure Easy Table of Contents
Log on to your WP-Admin dashboard. Under plugin, click Add new. Search for Easy table of content.
Install and activate the plugin.
Once you have installed and activated the plugin, you can access the plugin’s settings by going to Settings >>Table of contents.
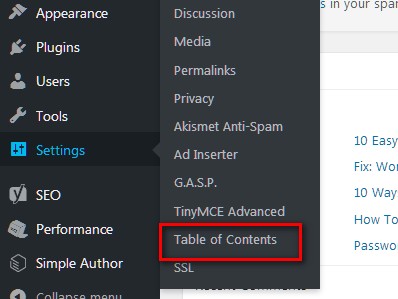
This will open the Plugin’s settings page.
General settings
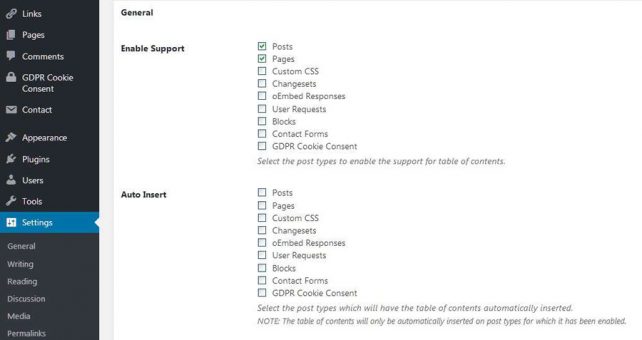
Under general settings, you can enable support for Posts and Pages. I feel that’s good enough. But if you want to enable it on other pages too, you can do so. See the image below
By selecting these options here, the plugin will enable support to insert a table of contents in WordPress individual posts/pages. Which you can access on the WordPress editor page if you scroll down.
Auto insert
I would suggest keeping these unchecked. If you select posts and pages under auto-insert, the plugin will automatically insert a table of contents in all your posts and pages.
This is not desirable, as some of your posts may be short content and may not require.
Position
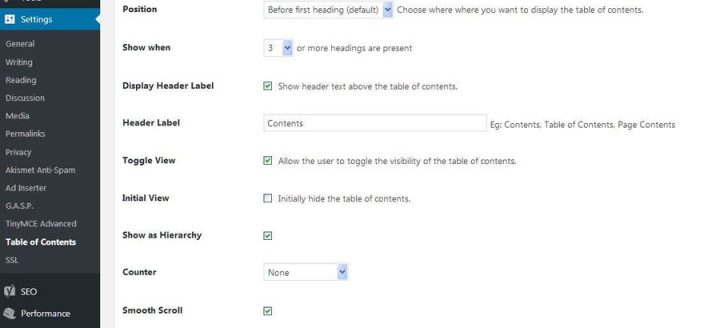
You can also auto-insert a table of contents or specify where it should be inserted. Before the first heading (Default), after the first heading, top or bottom. The default works fine.
Prevent ToC showing
You can prevent ToC from showing up if a post or page has less than a specified number of headers. The default is 3, you can change it here.
Header Label: You can change the header label too. Like Table of contents, or Contents or Page contents, etc. according to your liking.
Toggle View: You can specify to allow users to toggle the visibility of the table of contents. Whether you want to show the entire table of contents or a collapsed version with a link to expand it.
Counter
You can choose multiple counter formats, for example, decimal, numeric, roman, or none.
Appearance
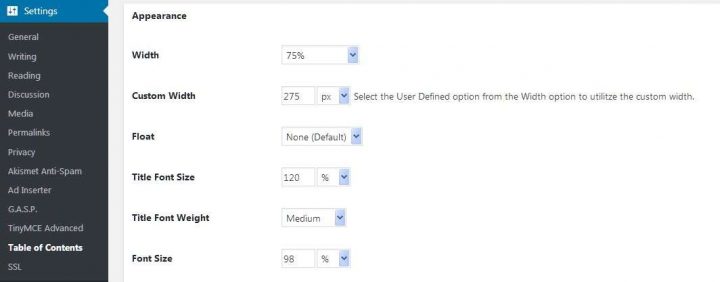
Under appearance, you can change the size of the table of contents (50% or 75% of the content area). You can also set a custom width ToC. Set the title font size, the font size for the links, font-weight, etc.
Theme
The plugin comes with 5 default themes built-in. Grey, light blue, white, black, transparent. You can choose the one to match your theme color.

Additionally, you can also customize the table of contents background color, font color, border color, title color, link color, etc. This you can do by selecting the custom option under the theme.
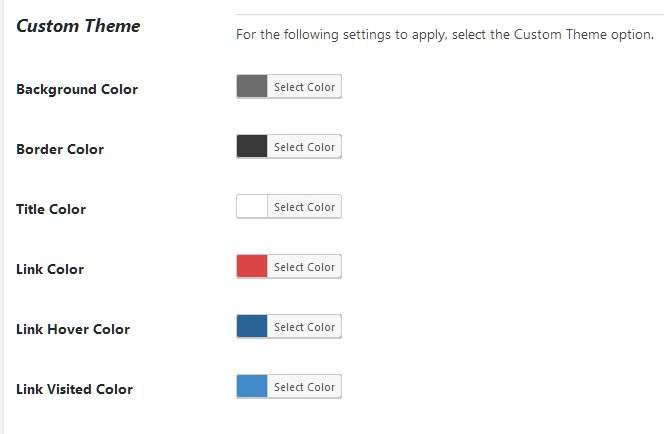
The best thing is, you need to set these settings only once.
Now when you insert a table of contents in a WordPress post or page, it will automatically use these settings.
Of course you can always change or modify these settings from the plug-in settings section.
Shortcode to insert Table of Contents manually
Even though the plugin has the option to insert ToC on all posts and pages automatically, you can also insert the table of contents in WordPress posts/pages manually by disabling the automatic feature.
To insert the Table of Contents in WordPress manually on a post or page, just type the following shortcode where you want the ToC.
This shortcode will automatically go through all the headers in your blog post/page and create a table of contents based on it.
Customize the Table of Contents in Blog posts/pages.
The setting section of the plugin allows you to set global settings for all your posts and pages. Additionally, if you want, you can also customize the Table of Contents individually per posts and pages basis, within the WordPress post editor.
You can exclude some headers, or use different header text per post/page basis. This you can do in the word press editor when you edit the post. More on this later.
Customize! Ignore headers categories Such as H2 or H3 or H4.
You can make the plugin ignore the global settings and specify which headers to be included in the table of contents. This can be done on a per post/page basis.
In the word press editor, scroll down and you will see the table of contents section.
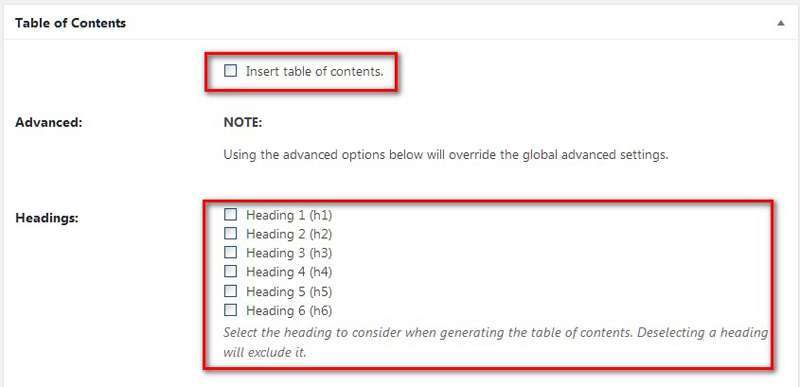
In this section, you can disable ToC, or select the headers you want to include in that particular post/page. For example, if you select only H2 and H3 headers, it will generate ToC with H2 and H3 headers only.
How to Create Alternate Headings
This is a very useful feature of this plugin. If you want to create an alternate heading for the shortcode, you can do that too.
For example: Suppose in your post you have a header as “How to Train a Dog: Complete guide”, and you want the ToC to show a different header like “Dog training guide”
This can be done in the Alternate headings section of ToC in the WordPress editor.
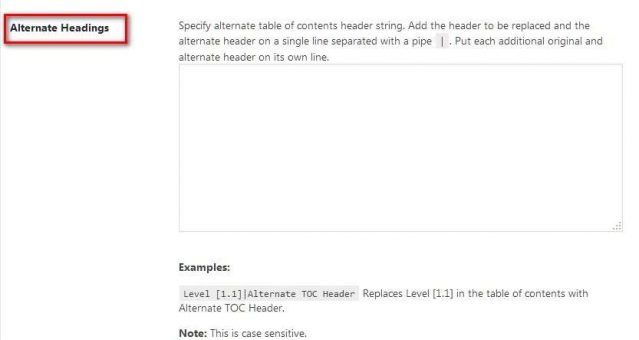
To change the header, in the table of contents in WordPress editor, use the following format:
Your original heading | Heading to show in ToC
Accordingly, as per our example above, you can use the following:
How to Train a Dog: Complete guide | Dog training guide
This is useful if your headers are long, and you want to keep them short.
Please note that these are case-sensitive, so you need to use the exact header text.
Exclude Specific Headers
If you want to exclude specific headers in the Table of contents, that too you can specify them here.
For example, you may have multiple H3 headers in your post. If you want to exclude a specific H3 header, you can do that under the Exclude Headings section in the ToC WordPress editor.
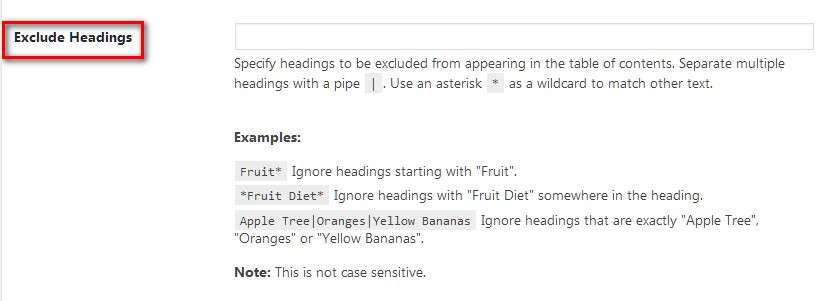
Just for example, if you want to exclude all Headers with the word “Dog”, use the exclude headers box as:
*Dog*
Examples:
*Diet* will Ignore headings starting with “Diet”.
*Fruit Diet* will Ignore headings with “Fruit Diet”
Note: This is not case-sensitive.
Note: This plugin needs to be kept activated all the time. If you deactivate the plugin, the Table of contents inserted in all your posts and pages will disappear.

Hello! I am Ben Jamir, Founder, and Author of this blog Tipsnfreeware. I blog about computer tips & tricks, share tested free Software’s, Networking, WordPress tips, SEO tips. If you like my post /Tips then please like and share it with your friends.


