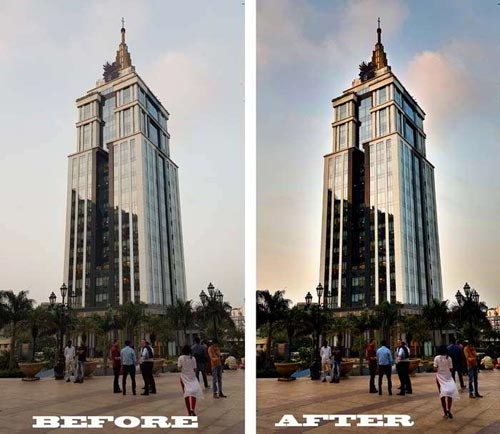
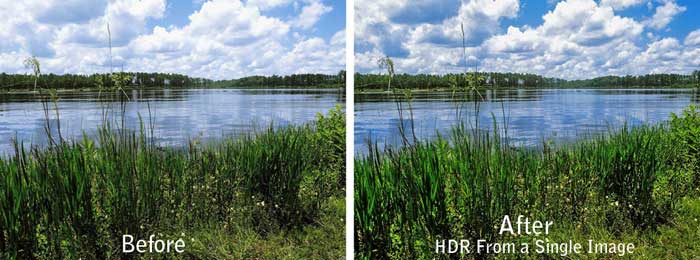
In this post I will show you a simple way to create the effect of an HDR(High Dynamic Range) image, using only 1 photo. This is not a true HDR, but it creates a very similar and dramatic effect.
Normally to create a true HDR ( high dynamic range) image you need to take 3 or more bracketed shots to make an HDR. An HDR photo is then created by blending in two or more images, taken at different exposure settings to create 1 photo with all the color and light as the original.
So that the result is a well-balanced and highly detailed picture called an HDR photo
This, of course, requires you to take multiple images at different exposure levels which may not always be possible.
But you can also create an HDR-like photo from one single photo in Photoshop. I will show you how to easily fake HDR effect in photoshop without the actual in-camera HDR process.
Make an HDR image from a single photo.
Step 1: First, choose a good photo. A photo having light, shadows, and preferably sky with clouds. Well, that’s just a suggestion as this type of image yields good results. You can choose any photo you want to create a fake HDR effect.
Open the photo in Photoshop. I am using Photoshop CS6, but any version of photoshop should do.
Step 2: Make a duplicate layer of the original background layer.
Step 3: Next go to Image > Adjustment > Desaturate. This will make your photo black and white image.
Step 4: Invert this layer by going to Image > Adjustment > Invert.
Step 5: Change the blending option of this layer to “Vivid Light”
Step 6: We need to convert this layer to a smart object. Right-click on the layer and choose “create smart object”
Step 7: Next go to Filter > Blur > Gaussian blur. Set the Gaussian blur radius to 14 to 16 pixels. This is not fixed as it depends on the picture quality. Higher pixels may produce the so-called bleeding effect on the edges. Something like a halo on the edges.
Step 8: On the layer, pallet reduce the opacity to 60%, you can adjust this to reduce the halo effect on the edges.
Step 9: Now make a duplicate layer of the original image. Drag this duplicate layer and place it on top of all the layers.
Change the blending mode of this duplicate layer to “Soft Light”. Reduce the opacity of this layer to 50% to 60%.
There you have it. Your HDR image from a single photo is done. Compare the just created HDR image with the original image, you will see the difference.
For better results tweak the opacity level and filter effects of the layers. This will largely depend on your picture size and quality. With practice, you can perfect this procedure to create a perfect HDR Image From a Single Photo.
Hello! I am Ben Jamir, Founder, and Author of this blog Tipsnfreeware. I blog about computer tips & tricks, share tested free Software’s, Networking, WordPress tips, SEO tips. If you like my post /Tips then please like and share it with your friends.
We use cookies on our website to give you the most relevant experience by remembering your preferences and repeat visits. By clicking “Accept”, you consent to the use of ALL the cookies.
This website uses cookies to improve your experience while you navigate through the website. Out of these cookies, the cookies that are categorized as necessary are stored on your browser as they are as essential for the working of basic functionalities of the website. We also use third-party cookies that help us analyze and understand how you use this website. These cookies will be stored in your browser only with your consent. You also have the option to opt-out of these cookies. But opting out of some of these cookies may have an effect on your browsing experience.
Necessary cookies are absolutely essential for the website to function properly. This category only includes cookies that ensures basic functionalities and security features of the website. These cookies do not store any personal information.