Last updated on August 14th,>>>
If you have started a blog or a website on Blogger.com, then you need to submit your blogger sitemap to google search console to be found by the search engine to drive traffic to your blog.
In this article, you will learn how to create and submit a blogger sitemap to the Google search console.
Search Console (earlier known as Google Webmaster Tools). is a free tool offered by Google which helps you to display your website in Google search results.
See also: How to redirect old URL to new URL in Blogger Blogspot
Page Contents
What is a Sitemap?
The Sitemap file is like a directory of all web pages that exist on your website or blog. Search engines like Google, Bing, and others use these sitemap files to discover pages on your site which otherwise the bots may have missed during regular crawling.
A sitemap informs the search engines to crawl and to index all your blog pages. So that it can discover every page from links within the site, and the pages get displayed in searches, that’s why it’s important to submit a blogger sitemap to Google search console.
Site Map as the name implies is just a map of your site. That basically shows the structure of your site on a single page, which includes, its sections, the links between them, etc.
Check out: How to remove the date from blogger post URL
Sitemaps are an important way of communicating between your site and search engines like Google, Yahoo, Bing, etc. for indexing all your Blog contents.
How to create a Blogger Sitemap
Before submitting your blogger sitemap to Google, first of all, you have to verify in Google Search Console that you’re the owner of the website.
If you have already done it, then go to the next section. If not see my detailed guide on how to verify ownership of blogger blog in Google search console.
Find out how many posts you have already published. This you probably already know or if you are not sure.
Log on to your Blogger account and go to settings –Posts- There you will see the number of posts already published shown at the top of the lists of published Posts.
Depending on the number of posts you have published you’ll need to create your sitemap. If the number of posts published is less than 500 then the sitemap will be as follows. (you can copy-paste the code)
atom.xml?redirect=false&start-index=1&max-results=500
This is the Sitemap code for the blogger blog that you need to add in the Google Add/Test sitemap field.
The above sitemap will work for 500 posts only. If you have more than 500 posts published on your blog, then you have to add one more sitemap.
The procedure will be the same, but at this time you have to add this code.
atom.xml?redirect=false&start-index=501&max-results=1000
The second sitemap will cover published posts up to 1000.
Let’s proceed to the next step to submit this site map to Google’s search console.
Submit Sitemap to Google Search console
Go to Google search console. Click on the “Start now” tab and log in with your blogger account.
On this page, on the left panel, it will display the List of Blogs you have. Select the one for which you want to submit the Sitemap.

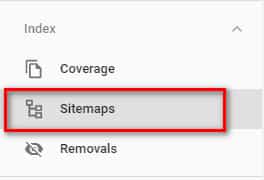
Next click on “Sitemaps” on the left panel menu list.
You will get this Add new sitemap option.

Here in the box next to your blog URL (in this image it’s showing my blog URL) either type or copy-paste the code, as shown above, corresponding to the number of blog posts published, then click on the “Submit”.
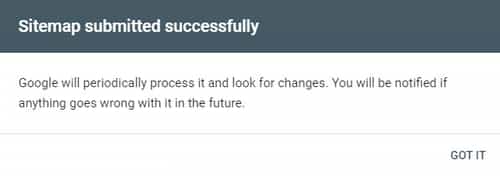
You may be asked to refresh(reload) the page, and Google will display this message.
 Next click on the submitted sitemap in the Google search console. The search console will display the number of posts submitted and the number of posts already indexed. as shown below

That’s it you are done. You have just submitted a blogger sitemap to the Google search console.
Check out: How to create a Navigation menu in blogger with Labels
Now you just have to wait for Google to crawl all your pages and index them. This may take a day or a few days. You can log on to the Google search console later again to check how many pages have been indexed.

Hello! I am Ben Jamir, Founder, and Author of this blog Tipsnfreeware. I blog about computer tips & tricks, share tested free Software’s, Networking, WordPress tips, SEO tips. If you like my post /Tips then please like and share it with your friends.


