Last updated on September 13th,>>>

If you are an Android phone user, by now you may have heard about “rooting” Android phone or seen a rooted Android phone or a tablet.
Every Android phone is running the Linux kernel. So power users were interested in gaining root access to make changes and graft on new features. Rooting is how you get complete access to everything in the operating system,
In short rooting Android device means, all limitations are removed and you get the privilege of a super user. Which means you can do just about anything with your Android Phone
To know more see our detailed post on What is rooting on Android means.
In this article, we show you step by step guide on how to easily root an Android device with software installed on your PC.
We will be using a Freeware tool called Kingo Android Root. This tool offers every Android user the easiest one-click method to root any Android devices.
Page Contents
How To Root Android Phone With PC
Before we proceed with the method to root an android device make sure
1: Your device is powered on.
2: Battery level is at least at 50% or above.
3: Internet connection is available.
4: USB cable to connect to your PC is available.
Below is a Short Video Tutorial on How to use KINGO ANDROID ROOT Tool
Didn’t like the Video? Then read on….
Download and install Kingo Root
Step 1: First download and install the Freeware Kingo Android Root. This is a freeware, just download from the above link and install it. This tool is required to root an Android phone with PC.
Step 2: Click on the installed icon to launch the Kingo Android root. Once launched you will see the following interface.
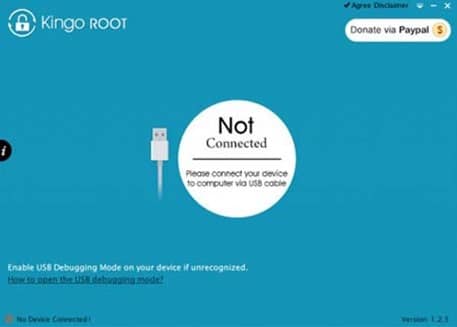
Step 3: Plug the Android Device Via the USB cable
If the device driver is not installed on your computer, the Kingo Android root will install it automatically. Make sure that your internet connection is active.
Step 4: Enable USB debugging mode on your Android Device. USB debugging mode is necessary for the Android rooting process.
IMPORTANT: Once USB debugging is enabled, pay attention to your device screen for prompts.
Make sure that you check the box “Always allow from this computer”. If not your device will be shown as Offline Device and rooting will not work.
Step 5: Please read the notification displayed by the Kingo Android Root tool.
All are self-explanatory. Please remember Android rooting is not a big thing, but Rooting your Android Device will immediately void the warranty of your device.
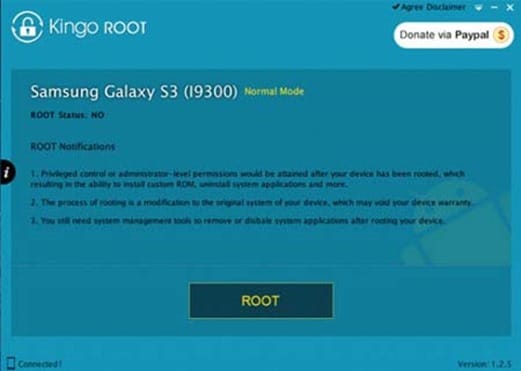
So Proceed to root your Android Device with caution and at your own risk.
Step 6: Click on ROOT to start rooting Android device
Kingo Android Root tool will start the process of rooting an Android device, which may take a couple of minutes.
During the process your device may reboot several times, this is perfectly normal. Once the process of rooting begins do not touch, move, unplug, or perform any operation on your device.
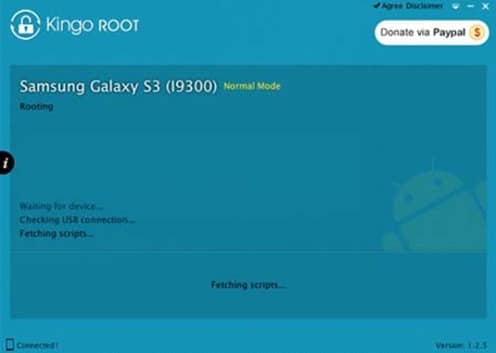
Step 7: Click Finish
After completion of rooting you will get the message “ Root Succeeded ! Root Succeeded ! Please reboot your device to make it more stable”.
That’s it, you have successfully rooted your Android Phone

Kingo Android Root software is one of the best Android Root Software. It supports almost all Android devices and versions. If your device is not supported by the Kingo Android Root tool, or it fails to root, you can read the following TIPS to troubleshoot
1: Kingo App Troubleshoot.
2: Save a Log File.
3: E-Mail for support
Image source Kingo Android Root web.
Disclaimer
This Post is for educational purpose only.Root android phone at your own risk. The author will not be held responsible for any damage to the device by using the tool described in this article

Hello! I am Ben Jamir, Founder, and Author of this blog Tipsnfreeware. I blog about computer tips & tricks, share tested free Software’s, Networking, WordPress tips, SEO tips. If you like my post /Tips then please like and share it with your friends.
