Last updated on August 15th,>>>
These days hard disk capacity sizes have increased considerably. One TB size has become the norm. So if you have installed a new hard drive, the first thing to do after installing a hard drive is to partition it.
You have to partition a hard drive, and then format it, before you can use it to store data.
To partition a hard drive in Windows means to divide it into different parts. Make one part available to the operating system and programs alone, and creating multiple partitions(parts) on the same hard drive is also possible so that you can store backup files in one partition, movies in another, etc.
Don’t worry if this sounds complex it isn’t hard and usually only takes a few minutes to do.
Since hard disks are becoming larger in capacity. Maybe this post might give you some idea of how to partition your hard disk.
You may like to read the advantages and disadvantages of Hard Disk partitioning.
What is Hard Disk Partitioning?
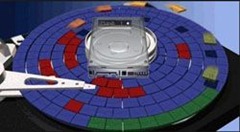
Disk partitioning is an act of dividing the hard disk into multiple logical storage units which are referred to as Partitions. It’s like treating a single hard disk as if it were multiple disks.
Now you may ask how many partitions do I need? that’s a good question. Before you proceed to slice your hard disk into (Partitions), think clearly what are your needs are.
If your hard disk is 500GB in size (that’s a lot of space unless you are a gamer) first write down in a piece of paper the number of Partitions you will require and what size each partition should be.
Well I can not write here as if it were the only options to have that many partitions. But if I am to partition my hard disk I would do this way. (This is just my way of doing, you may have your way, this post is just to guide you)
But first let’s try to understand Primary partition and Extended partition.
In a hard disk when you make the first partition where windows (Operating system) will be installed. This becomes the primary partition, this is the active partition from which your operating system will boot.
The remaining unallocated space of your hard disk becomes the Extended partition. Inside this extended partition you can have as many logical partitions you want. As shown in the below image.
The part of the disk enclosed within the green-colored box is your extended partition, and as you can see inside that extended partition other partitions are there which are called logical partitions. You can have as many logical partitions as per your needs.
You can have as many primary partitions as active partitions if you opt for a multiboot disk that is installing more than one operating system.
Let’s assume we are going to install only one OS, so how do we go about partitioning this 500GB hard disk
A GUIDE: How To Partition a Hard Drive In Windows?
1. Primary partition 1 for the OS = Size 100GB I feel that’s sufficient for the OS and program files I might install.
2. After creating this partition, I would create an extended partition for the remaining space.
3. Once done, within this extended partition, I would start making the logical partitions as per my needs as follows
LOGICAL PARTITIONS:(partitions within the extended partition)
1 I would allocate about 20GB for DOCUMENTS
2. Then I would allocate 80 GB for PICTURES
3. Then another 80 GB for my collections of MP3 music files
4. Then another 100 GB for my Movie collection
Then another 80 GB for my software back up. Since you never know when you need that software to reinstall. Back up all your system drivers, Motherboard drivers (don’t rely on your optical disks ) so it’s a good idea to back up your drivers that come with your new PC be copied and kept in folders inside your backup partition.
I usually create an extra partition and name it TRIAL or EXTRA. This is where I keep my miscellaneous items like some downloaded pictures or PSD files that I work on and when done I delete the files. Just like an extra huge dust bin or like a temporary transit point. This is optional.
That takes up about 480GB of my space and I still have around 20 GB more free space. This you can allot according to your needs, for example if you have too many video collections allocate more space. If you have too many Music or Photo collection you can allocate the space accordingly.
Well this is just an example of how many disk partitions we may require. You can have your own way of allocating and naming the partitions or even create some more extra partitions.
There is a lot of free software available for disk partitioning, but among all, One that stands out as far as functionality, reliability is concerned is MINITOOLS PARTITION WIZARD. I have been using this software for many years now.
Mini tools Partition wizard Home edition is a free disk utility that has powerful partition management capabilities, compatible with both 32-bit and 64-bit Windows installations. Partition Wizard Home Edition is a great freeware that can both simplify and enhance the window’s capabilities. It’s an all in one disk partition manager and does its job well.
Third-party software like Mintool Partition Wizard Home Edition is very good and helpful software with easy to understand user interface.
This Partition wizard Home edition is a very powerful tool and does the job neatly. This is a must-have tool for every home user and its completely free.
Download MINITOOL PARTITION WIZARD

Hello! I am Ben Jamir, Founder, and Author of this blog Tipsnfreeware. I blog about computer tips & tricks, share tested free Software’s, Networking, WordPress tips, SEO tips. If you like my post /Tips then please like and share it with your friends.
