Last updated on April 29th,>>>
Application Not Found This is the error message Windows displays when you insert your USB flash drive and try to open it in windows explorer. Whenever you insert your flash drive in the USB port and try to open it, you get the error message “F:\ application not found.”
How to fix Application not found error message with USB drives.
Windows explorer shows your USB flash drive correctly, with a drive letter assigned to it. No yellow exclamation mark, everything appears normal.
But when you left-click on the drive icon to open its content, you get the “Application not found” error message, as shown in the image below.
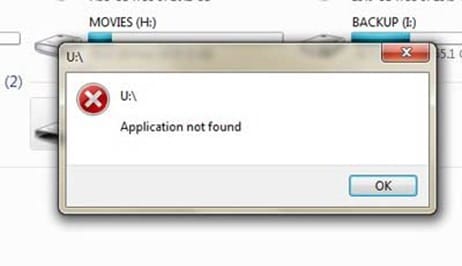
But the strange part is when you right-click on the icon and click “open” from the context menu, the USB flash drive opens and you can use it normally.
Strangely again, it also works if you click on the drive icon under my computer in the left panel of the windows explorer. And you can open the USB drive and access the content.
One suggestion was to set Autoplay for mixed content in the control panel to “Take no action”. But even that did not work.
A very strange problem indeed, but a very easy solution.
See also How to Protect USB drives From Viruses and Malware
SOLVED: Here’s how to solve Application Not found Error message with USB Flash drives:
If you prefer a video tutorial you can watch below
Step 1:
Right-click on MY COMPUTER icon on the desktop, from the context menu, select and click “Manage”
Step 2:
Once you do that, this will open the “Computer Management” console.
Step 3:
On the Computer Management console on the left panel click on “Disk management”
Step 4:
Windows will open the Disk Management console, showing all the drives and partitions of your hard disk as well as the CD/DVD drive and other USB drives attached. With drive letters assigned to each partition and attached USB drives.
Step 5:
Select the USB flash drive, right-click on it and select the option “ Change drive letter and paths”. Windows will display a small window “Change drive letter and paths”.
Here click on the option “Change”. Windows will display “Assign the following drive letter” with the current drive letter assigned to the USB flash drive selected. See the image below.
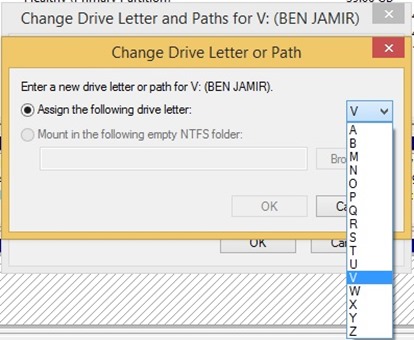
Click on the drop-down arrow and select a different drive letter for the USB flash drive, and click on “OK” to assign a different drive letter for the USB drive.
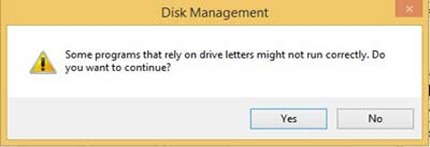
Windows will show a warning message, just click on YES.
Step 6:
Close the Computer management console.
See also How To Password Protect USB Thumb Drive 3 Easy Ways
What we have done is just changing the drive for the USB flash drive, assigning a new drive letter. Now open windows explorer, and click on the USB drive icon, it will open and work normally.

Hello! I am Ben Jamir, Founder, and Author of this blog Tipsnfreeware. I blog about computer tips & tricks, share tested free Software’s, Networking, WordPress tips, SEO tips. If you like my post /Tips then please like and share it with your friends.

