Last updated on October 5th,
A lot of websites use JavaScript as a part of their core functionality. If you browse the Internet without JavaScript enabled, you may not get the full experience. Some websites may not even work properly.
Basically JavaScript is a programming language, that website developers can use as a part of creating websites.
This guide will walk you through on how to enable JavaScript in Google Chrome, with screen shots.
These screen shots are taken on a windows 8.1 computer, but the process is the same for Mac OS X.
If you prefer a Video Tutorial, we have one..
Page Contents
How to enable JavaScript in Google Chrome Step by step guide
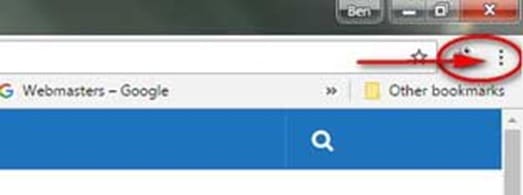
Step 1: Click the “Customize and Control” button

Click on the Customize and Control button, the three DOTS on the extreme top right of Chrome browser.
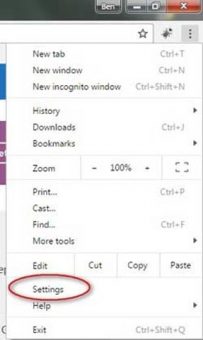
This will open the Chrome menu, with plenty of options. At the bottom click on the Settings
Step 2: Click on the Settings Menu

Google Chrome settings window will now open.
3: Search for JavaScript Settings.

In the settings window there is a search box. Type “JavaScript” there. As you type Chrome settings window will start changing
It will show the “Privacy” section and the content settings button will show the yellow “JavaScript” callout.

Step 4: Change JavaScript Settings ( Enable JavaScript )
Now you will be presented with the JavaScript settings.
Here choose the option “Allow all sites to run JavaScript (recommended) button. In this page you can also disable JavaScript completely on Google Chrome if you choose to do so.
But if you want to enable JavaScript on certain websites only, you can use the “Manage exception” option to control on which websites JavaScript will run.
Well, once you have clicked to enable JavaScript, click on the “Done” button to confirm and save your settings.
You can now close this tab/window and resume browsing with JavaScript enabled on Google Chrome.

Hello! I am Ben Jamir, Founder, and Author of this blog Tipsnfreeware. I blog about computer tips & tricks, share tested free Software’s, Networking, WordPress tips, SEO tips. If you like my post /Tips then please like and share it with your friends.


