Last updated on May 25th,>>>
Forgetting your BIOS password happens to the best of us. But before you give up yourself without access to your computer’s core settings, fear not! This guide will walk you through several methods to reset your BIOS password and get you back in control.
We’ll cover simple solutions/techniques, so no matter your level of tech savviness, there’s a fix here for you. Let’s dive in and reset your BIOS password!
Many users do set up a password to gain access to the BIOS setup. To prevent unauthorized access to the BIOS setup.
This sometimes becomes necessary, because a wrong BIOS set-up may make your computer unbootable.
But if you forget your password or if you have purchased a second-hand Computer (which has a password for the BIOS settings), the moment you try to access the BIOS or CMOS setup you will get the following warning screen, as shown below.
“ Setup is locked. You must enter the admin password here to change any settings”
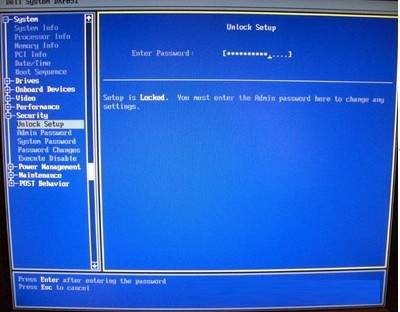
Unless you enter the correct password you can not access the BIOS setup screen. In such a scenario you will need to reset BIOS password or completely remove it.
There are two easy methods, to reset or remove the BIOS password, the Battery method and the Jumper method.
Page Contents
Two methods to reset or remove BIOS or CMOS password
Method 1:Clear Password using the JUMPER ( Recommended)
Disconnect your computer from the mains, and ground yourself properly before touching the motherboard to avoid the potential damage that can occur due to ESD (Electrostatic discharges).
To prevent ESD, just make sure all electrical cords are unplugged from the computer, or you can use an ESD wrist strap or a grounding mat.
If you do not have access to these Just touch the unpainted metallic surface of the chassis continuously while performing the procedure.
Open the computer casing cover. On the motherboard locate the BIOS clear or Password jumper.
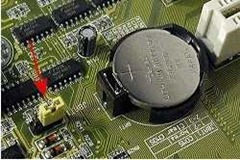
Different motherboard manufacturer has different ways of labeling this jumper. This jumper is often labeled as CLEAR, CLEAR CMOS, CLR, CLR_CMOS, CLRPWD, PASSWD, PASSWORD, PSWD or PWD as shown in this image.
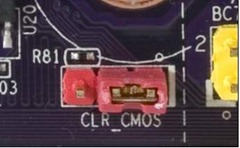
In this Image, the jumper location is labeled as CLR_CMOS. This jumper switch has three PINS labeled as number 1, 2, 3.
By default, the jumper connects the PIN number 1 and 2. This is the normal position of the jumper. In the Image shown here, the free Pin on the left is pin number 3.
To reset BIOS or CMOS password, what you have to do is to take out the jumper and place it connecting the pin numbers 2 and 3.
The jumpers are connectors only, so by placing them over pin numbers 2 and 3 we are connecting these two pins.
Once you have done that, just turn on your computer, the password will be cleared. Once the password is cleared.
Disconnect your computer from the mains and place the Jumper back on its default position, that is connecting pin numbers 1 and 2.
Method 2: Remove the CMOS Battery
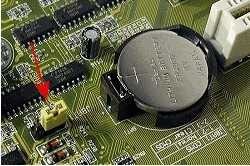
Removing the CMOS battery from the motherboard as shown in the picture below will make the CMOS chip lose all settings including the password. The chip is powered by the CMOS battery when the system is not running.
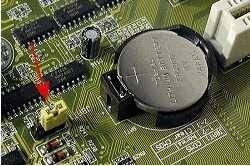 First, locate the CMOS battery on the motherboard, then with a Screwdriver gently take out the Battery, and remove it from the motherboard for at least 10 minutes.
After that put the battery back on the motherboard and power on the Computer.
All BIOS settings will be cleared, including your Computers Clock will be reset, you will need to set it again.
I would not advise this method, because many a time there is a chance of damaging the motherboard when attempting to take out the CMOS battery since some manufacturers tend to include clamps to keep the CMOS battery in place.

Hello! I am Ben Jamir, Founder, and Author of this blog Tipsnfreeware. I blog about computer tips & tricks, share tested free Software’s, Networking, WordPress tips, SEO tips. If you like my post /Tips then please like and share it with your friends.
