Last updated on April 28th,>>>

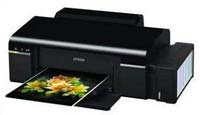
How To Print A Poster On Multiple Pages using Photoshop. You can print huge posters using a regular home printer.
To print a poster on multiple pages first you would have to split the photo into parts. So that every part fits into a A4 size photo paper, that can be printed on a regular home printer.
How to Print a Poster on multiple pages in Photoshop
Remember, to blow up an image and print it as a poster, your image must be of very high quality. Though it depends how big a poster you want to print.
First open the image in Photoshop. (here I am using a windows wallpaper for example)

From the Tools list on the left select the “SLICE” tool in Photoshop.
After selecting the slice tool, right-click on the image, that is open in Photoshop.
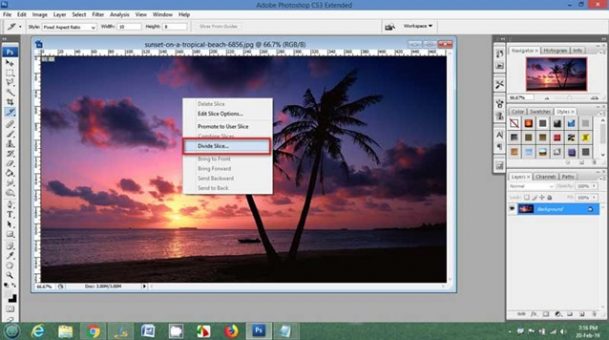
From the context menu select Divide Slice. Photoshop will show you the following options.
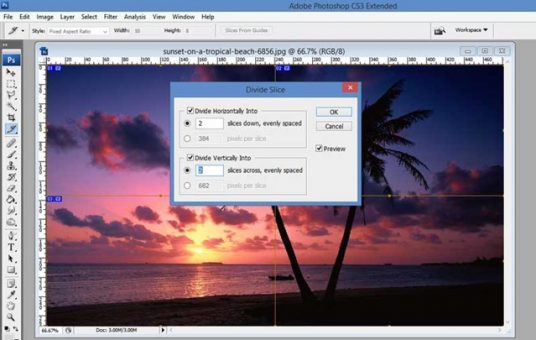
This is where you can slice a photo into multiple pages to print your poster. Put a checkmark under “Divide horizontally into”.
Here you can enter the number of pages you want the photo to split horizontally. For example, if you put 4, Photoshop will slice the image into 4 equal parts.
Similarly, put a checkmark on “Divide vertically into”. Here too you can insert a number that you want to slice the image vertically. Naturally, the slice number should the same horizontally and vertically.
After that click on OK.
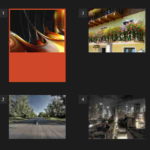
For this image, I wanted to print it into 4 A4 size paper, so I put 2 in both the fields. As you can see in the below image, Photoshop slices the image into four different images.
See also Photoshop tutorial to Make a Colorful Twirl Effect
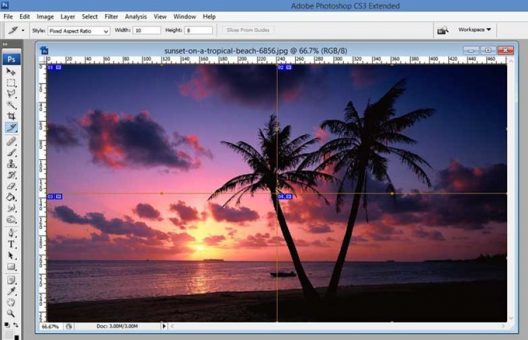
Remember, the more is the number of slices, the bigger will be your poster. Since each image will be printed in one A4 size photo paper.
The above image has been sliced into four equal parts, which can be printed on 4 ..A4 size photo paper.
To save these sliced images. Click on File and choose “Save for Web & Devices”
See also How to change hair Color in Photoshop
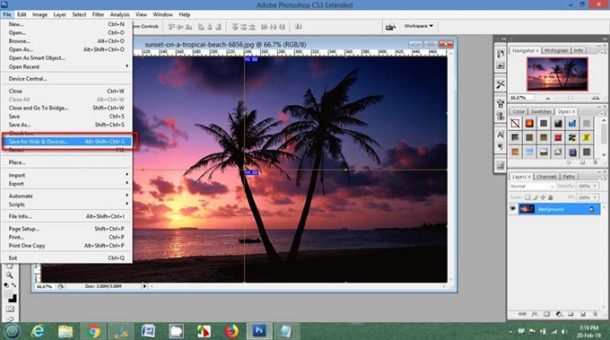
Under “Save for Web & Devices options, make sure to choose JPEG in the right panel.
Put a checkmark “Optimized”. You can choose the option JPEG medium or high, quality to 100. Keep all settings to default.
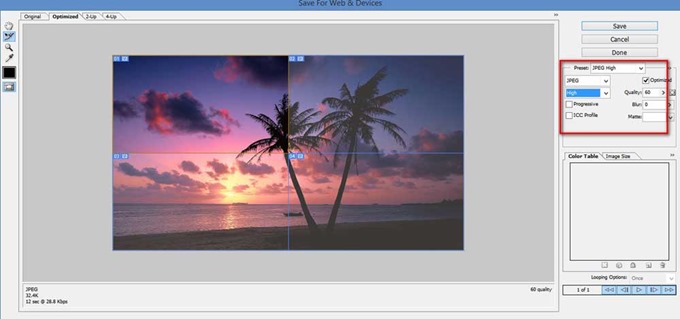
Now click on the save button and save the images where you want to save.
Photoshop will save the sliced images saved on a folder “Images” with all the sliced images.

Each image can be printed on a A4 sized photo paper and glued together and you have your poster.
Very easy to print a poster on multiple pages in Photoshop.

Hello! I am Ben Jamir, Founder, and Author of this blog Tipsnfreeware. I blog about computer tips & tricks, share tested free Software’s, Networking, WordPress tips, SEO tips. If you like my post /Tips then please like and share it with your friends.

